")

TL;DR:
- Getting your senior photos makeup right can be challenging because camera lighting reveals flaws ignored in everyday mirror checks. Proper application includes controlling shine with mattifying primers, avoiding shimmer and mineral sunscreens, and practicing your look beforehand to ensure confidence and natural results. Whether professionally done or DIY, thorough preparation, product knowledge, and a cohesive style are key to capturing your authentic self in stunning portraits.
Getting your senior photos makeup right feels stressful when you realize that what works in your bathroom mirror can look completely different on camera. Skin reflects light differently under studio strobes and bright natural sun, and the wrong product choices can leave you looking washed out, shiny, or overdone in ways that are nearly impossible to fix in editing. This guide gives you a practical, step-by-step path to makeup that looks natural, lasts all session long, and actually photographs the way you want it to.
Table of Contents
- Key takeaways
- The best senior photos makeup products to start with
- Step-by-step senior photos makeup application
- Common mistakes that can hurt your look on camera
- Professional makeup artist vs. DIY for senior portraits
- Final tips for a great senior photo experience
- My honest take on senior photos makeup
- Book your session with Jodiblodgettphotography
- FAQ
Key takeaways
| Point | Details |
|---|---|
| Control shine before it starts | Use mattifying primer on your nose, forehead, chin, and smile lines before foundation for a camera-ready matte finish. |
| Skip shimmer and certain sunscreens | Glitter and shimmer reflect flash harshly, and mineral sunscreens with zinc oxide can cause white flashback in photos. |
| Apply in thin, targeted layers | Build foundation and powder in thin layers only where needed to avoid a flat, cakey appearance on camera. |
| Practice your look beforehand | Do a full trial run at least two days before your session so you have time to adjust products or application techniques. |
| Confidence outperforms perfection | Minor imperfections are retouchable, so your job is to feel like yourself so that energy shows in every frame. |
The best senior photos makeup products to start with
Good senior portrait makeup starts with your product lineup, not your technique. Choosing the wrong formulas can create problems that no amount of careful blending will fix once you are under bright lights or standing in direct sun.
Here is what to build your kit around:
- Mattifying primer: Apply this to your nose, forehead, chin, and smile lines before foundation. Targeted mattifying primer gives you a long-lasting soft-matte finish that photographs beautifully without flattening your skin completely.
- Light-to-medium coverage foundation: Choose a formula that matches your skin tone precisely. Going too light to “look better on camera” almost always backfires.
- Creamy concealer: Use it on blemishes and under your eyes for gentle brightening. Avoid heavy coverage concealers that cake into fine lines.
- Translucent setting powder: Use sparingly. It goes only on shine-prone zones, not your entire face.
- Mascara and eyeliner: Stick to brown or black mascara on your top lashes. For eyeliner, keep it to your upper lid for definition that reads well in photos without looking harsh.
- Setting spray: The final step that holds everything together through lighting changes and any time spent outside.
Pro Tip: Check your sunscreen ingredients before your session. Zinc oxide and titanium dioxide can cause a white flashback effect under camera flash. Opt for a chemical sunscreen or a tinted mineral formula instead.
One product category people overlook is skincare prep. Moisturized, smooth skin gives foundation something to grip evenly. If your skin is dry and flaky going into the session, even the best foundation will look patchy in photos. Use your regular moisturizer the night before and morning of, and layer your sunscreen correctly: chemical formulas go on after moisturizer, mineral formulas go on before foundation, and both need a full minute to set before you apply anything on top.
Step-by-step senior photos makeup application
This is where technique matters as much as products. Follow this sequence and you will have a look that holds up through a full portrait session.
- Cleanse and moisturize. Start with clean skin. Apply your regular moisturizer and let it absorb for five to ten minutes before anything else.
- Apply sunscreen. Pick a photo-safe formula and let it set fully. Rushing this step causes pilling under your foundation.
- Prime your shine zones. Dab mattifying primer onto your nose, center forehead, chin, and the creases around your mouth. You do not need primer everywhere.
- Apply foundation in thin layers. Start at the center of your face and blend outward. One thin layer is usually enough. If you need more coverage in spots, add a second very thin layer only where needed rather than applying more all over.
- Conceal strategically. Tap concealer over any blemishes and along your under-eye area. Blend with a damp beauty sponge to avoid a cakey look.
- Set only where it counts. Setting powder under your eyes, sides of your nose, chin, and mouth corners controls shine without making your whole face look flat. This is one of the biggest mistakes people make: setting everywhere when you only need it in a few places.
- Define your eyes. Apply mascara to your upper lashes only, or use it lightly on your lower lashes if that is your normal look. Eyeliner on the top lid keeps your eyes defined and natural without the dragging effect heavy liner creates on camera.
- Add blush and lip color. Soft peachy or rosy tones work well for most complexions. Blend blush onto the apples of your cheeks and sweep it lightly upward. For lips, a tinted balm or a muted natural shade photographs better than anything very dark or very pale.
- Finish with setting spray. Hold the bottle about a foot from your face and mist evenly. Let it dry naturally. This step is non-negotiable if your session includes outdoor shots in warm weather.
Pro Tip: Do your makeup in natural light if possible. Bathroom lighting often hides the unevenness and excess product that camera lenses pick up immediately.
Common mistakes that can hurt your look on camera
Even seniors who are good at everyday makeup run into photo-specific pitfalls. Knowing what to avoid is just as useful as knowing what to do.
- Going too heavy with foundation or powder. Camera lenses compress depth, which makes thick makeup look flat and mask-like. Less really is more here.
- Using shimmer or glitter anywhere on your face. Glitter and shimmer products scatter light under flash and create distracting bright spots that editing cannot always fully remove.
- Using the wrong sunscreen. White flashback is one of the most common surprises in senior photos. Your skin can look perfectly normal to the naked eye and then appear ghostly pale in flash-lit images.
- Skipping the setting spray. Powder alone does not lock makeup in place the same way. Under hot lights or summer sun, your look can shift faster than you expect.
- Starting makeup too late. Give yourself at least 45 minutes for a relaxed application. Rushing leads to uneven blending and skipped steps.
- Ignoring your own style. This is your photo. If you never wear a bold red lip in real life, your senior portrait is not the day to try it for the first time.
“Professional photographers can retouch minor skin imperfections, so makeup should focus on enhancing your natural beauty rather than trying to create artificial perfection.”
That last point deserves a moment. A lot of seniors feel pressure to look “done up” in ways that feel foreign to them. The photos that always look the most memorable are the ones where the person looks genuinely like themselves, only slightly more polished.
Professional makeup artist vs. DIY for senior portraits
This is a real decision worth thinking through before your session date arrives.
| Factor | Professional makeup artist | DIY approach |
|---|---|---|
| Knowledge of lighting and flash | High. Pros understand how light reads on skin. | Requires research and practice to match. |
| Stress level day of session | Lower. Less to manage yourself. | Higher if you are rushing or unsure. |
| Cost | Additional expense, varies by area. | Low to no extra cost. |
| Personal style control | Good, with clear communication. | Full control over your look. |
| Product quality | Professional grade, photo tested. | Depends on what you own or purchase. |
| Convenience | Pre-session appointment needed. | Apply at home on your schedule. |
Professional makeup artists understand how light interacts with skin, how to control shine, and how to avoid overdoing makeup under the bright lights used in portrait sessions. That expertise is genuinely valuable, especially if you have never had your makeup done professionally before.
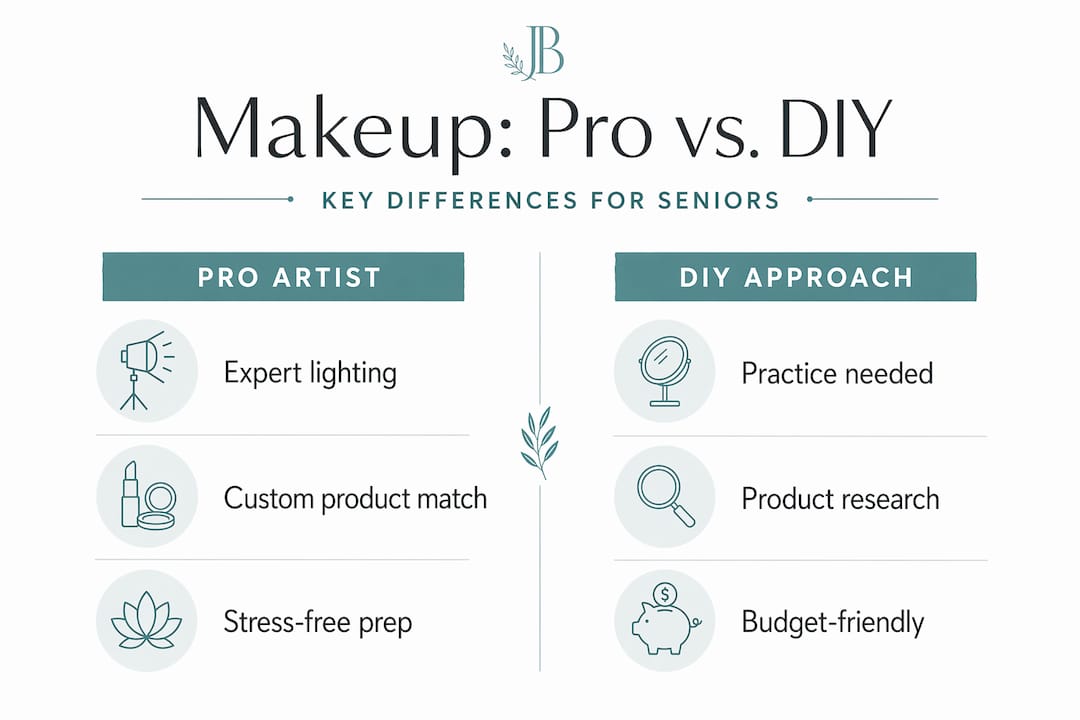
That said, DIY absolutely works when you put in the preparation. The key differences are practice and product research. Do a full trial run at least two days before your session. Photograph yourself with flash in your trial run and actually look at those photos critically. Adjust accordingly.
Pro Tip: If you hire a professional artist, bring reference photos of your everyday makeup and photos of senior portraits whose looks you admire. Clear communication always produces better results than hoping they guess your style correctly.
For those in the New England area, the senior portrait preparation tips at Jodiblodgettphotography cover styling considerations alongside photography specifics that can help you coordinate the whole look.
Final tips for a great senior photo experience
The technical prep matters, but so does everything surrounding it. A few finishing touches make a real difference.
- Coordinate with your outfit. Your makeup and clothing should feel like they belong together. If you are wearing warm-toned outfits, lean toward warm blush and lip shades. For cool-toned outfits, softer pinks and berries complement well. Check out outfit coordination ideas to plan a cohesive look from head to toe.
- Test your look under flash. Snap a few photos of yourself in your finished makeup before the actual session. This is the only real way to catch flashback or excess powder before it matters.
- Pack a small touch-up kit. Bring your powder, a lip color, and a small mirror. Sessions can run longer than planned, especially if you are shooting at multiple locations.
- Relax into it. Tension shows in photos. The seniors who look most comfortable are the ones who trusted their prep and let themselves be present in the session.
Pro Tip: Blot, do not powder, for touch-ups during your session. Blotting papers absorb oil without adding product or creating buildup.
Hair styling is part of this equation too. A look that is polished in makeup but messy in hair feels inconsistent on camera, and vice versa. Plan both with the same intention.
My honest take on senior photos makeup
I have photographed a lot of seniors, and the ones who look best in their portraits are almost never the ones who spent the most time on makeup. What I have seen time and again is that simpler, more intentional looks hold up better under real session conditions. Heavy coverage tends to crack or shift by the second outfit change. Dramatic eye looks distract from expression. And the seniors who feel most “themselves” in their makeup show a confidence in their eyes that no editing tool can fake.
What I have learned is that preparation genuinely beats product quality on this one. A student who practices their look twice, photographs it under flash, and makes one small adjustment will almost always outperform someone who spends three times the money on products but applies them carelessly on the day of the session.
I also want to say something about the professional versus DIY debate: neither choice makes or breaks your photos. I have seen stunning portraits come from both. The real variable is preparation and communication. If you go DIY, test it on camera. If you hire a pro, show them reference photos and be specific about what feels like “you.”
Confidence really is the best accessory you can bring to a senior session. Every technique in this guide exists to help you feel great so that when you step in front of the camera, you are not thinking about your makeup anymore. You are just being yourself.
— Andrew
Book your session with Jodiblodgettphotography

When your makeup prep is solid, the right photographer makes all the difference in whether those efforts show up beautifully in your final portraits. Jodiblodgettphotography specializes in senior portrait sessions across Massachusetts, Connecticut, and Rhode Island, with a deep understanding of how natural light and studio conditions interact with skin tone and makeup choices. Jodi works with you before and during your session to make sure every element, from lighting angles to the moments between poses, brings out your best. If you are ready to invest in portraits that feel genuinely like you, book your senior session and start the conversation today.
FAQ
What makeup is best for senior photos?
Light-to-medium coverage foundation, mattifying primer, translucent setting powder (applied only to shine-prone zones), mascara on upper lashes, and a setting spray give you the most photo-friendly results. Avoid shimmer, glitter, and heavy powder formulas.
Can mineral sunscreen cause problems in senior portrait photos?
Yes. Mineral sunscreen ingredients like zinc oxide and titanium dioxide can create a white flashback effect under camera flash. Use a chemical sunscreen or a tinted mineral formula for photo sessions instead.
How do I make my makeup last through a full senior photo session?
Apply a mattifying primer to shine-prone zones before foundation, set with translucent powder only where needed, and finish with a setting spray. Bring blotting papers for touch-ups rather than adding more powder throughout the session.
Should I hire a professional makeup artist for senior portraits?
A professional artist understands camera lighting and exposure effects that are easy to miss when doing your own makeup. If your budget allows, it is worth considering. If you go DIY, do a full trial run photographed under flash at least two days before your session.
How far in advance should I do a makeup trial for senior photos?
Do your trial at least two days before your session. This gives you enough time to identify any products that photograph poorly and swap them out without rushing.
Recommended
- The Essential Guide to What Makes Great Portraits | Jodi Blodgett Photography
- Master Posing for Senior Pictures: Capture Personality Easily | Jodi Blodgett Photography
- Senior Portrait Photography Tips for New England | Jodi Blodgett Photography
- Master Senior Photography Posing for Memorable Images | Jodi Blodgett Photography